Aug 18

软件源配置文件是 /etc/apt/sources.list。将系统自带的该文件做个备份,将该文件替换为下面内容,即可使用 TUNA 的软件源镜像。

如果遇到无法拉取 https 源的情况,请先使用 http 源并安装:
$ sudo apt install apt-transport-https

# 默认注释了源码镜像以提高 apt update 速度,如有需要可自行取消注释
deb https://mirrors.tuna.tsinghua.edu.cn/debian/ buster main contrib non-free
# deb-src https://mirrors.tuna.tsinghua.edu.cn/debian/ buster main contrib non-free
deb https://mirrors.tuna.tsinghua.edu.cn/debian/ buster-updates main contrib non-free
# deb-src https://mirrors.tuna.tsinghua.edu.cn/debian/ buster-updates main contrib non-free
deb https://mirrors.tuna.tsinghua.edu.cn/debian/ buster-backports main contrib non-free
# deb-src https://mirrors.tuna.tsinghua.edu.cn/debian/ buster-backports main contrib non-free
deb https://mirrors.tuna.tsinghua.edu.cn/debian-security buster/updates main contrib non-free
# deb-src https://mirrors.tuna.tsinghua.edu.cn/debian-security buster/updates main contrib non-free

清华大学开源软件镜像站
镜像使用帮助


May 04

CoreDNS 1.5 彻底废除了 Proxy 插件,用 Forward 插件替代,但想不到怎么写才能实现分流,它不允许一个服务器块中用两次 forward。

只好重新把 Proxy 插件编译进去,添加原 coredns/proxy 插件,编译会出错:

proxy.go:107:22: state.ErrorMessage undefined (type request.Request has no field or method ErrorMessage)

暴力修改过的版本,可以编译通过并且可用:https://github.com/rampageX/proxy

编译方法:

按照官方的方法,git clone 下来后,修改 plugin.cfg ,添加一句:

proxy:github.com/rampageX/proxy

然后 make 即可。

root@phicomm-n1:/devel/src/coredns# ./coredns -plugins
Server types:
dns

Caddyfile loaders:
flag
default

Other plugins:
dns.alternate
dns.any
dns.auto
dns.autopath
dns.bind
dns.cache
dns.cancel
dns.chaos
dns.debug
dns.dnssec
dns.dnstap
dns.erratic
dns.errors
dns.etcd
dns.federation
dns.file
dns.forward
dns.grpc
dns.health
dns.hosts
dns.k8s_external
dns.kubernetes
dns.loadbalance
dns.log
dns.loop
dns.metadata
dns.nsid
dns.pprof
dns.prometheus
dns.proxy
dns.ready
dns.reload
dns.rewrite
dns.root
dns.route53
dns.secondary
dns.template
dns.tls
dns.trace
dns.whoami
on

:mrgreen: :mrgreen: :mrgreen:


Apr 28

目前就这个靠谱,也简单: BlockTheSpot,把 netutils.dll 丢到 Spotify 安装目录(通常是 %APPDATA%/Spotify)就行。

备份下先。 :mrgreen: :mrgreen: :mrgreen:

2021 转移阵地:mrpond/BlockTheSpot

PowerShell 下运行:

Invoke-WebRequest -UseBasicParsing 'https://raw.githubusercontent.com/mrpond/BlockTheSpot/master/install.ps1' | Invoke-Expression

Apr 26

2019-04-26_134016_cr.png

1. 参照下面两篇文章:

Cannot come back from advanced tomato to asus merlin

Just thought I'd add a pointer to this post for anyone wishing to move from this fork to the latest Merlin builds on the ARM routers.

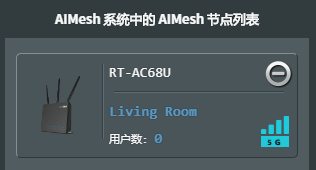
通过过渡固件把 68U 的固件升级到最新版: Version 3.0.0.4.384.45713;

2. 主路由可以是普通路由模式或者 AP 模式;

3. 扩展路由选 AiMesh 模式或者直接按住 reset 重置;

4. 主路由 AiMesh 界面,等待扩展路由无线灯全亮后会找到扩展路由,加入即可。


Mar 30

NFS 比 SAMBA 稳定,速度也快,所以决定用 NFS 取代 PHICOMM N1上的 SAMBA 共享。

一. 服务端,N1 运行 Ubuntu 18.04 版本,IP 为 192.168.2.20。

1. 首先停用 SAMBA。

sudo systemctl stop smbd
sudo systemctl disable smbd

2. 安装 NFS 服务组件:

sudo apt-get install nfs-kernel-server

3. 配置 NFS:

sudo nano /etc/exports

添加需要共享的目录,例如:

#共享目录 #允许的客户端网段(挂载选项)
/sync 192.168.2.0/24(rw,sync,no_subtree_check)

如果要为 Android 系统(例如电视盒子等)或者 OSX 等提供服务,需要加 insecure 参数:

#共享目录 #允许的客户端网段(挂载选项)
/sync 192.168.2.0/24(rw,async,insecure,no_subtree_check)

4. 重启 NFS 服务即可:

sudo systemctl restart nfs-server

二. 客户端,Windows 10,需要企业版。

1. 首先启用 NFS 客户端:控制面板\程序\程序和功能 - 启用或关闭 Windows 功能,选中 NFS 服务 下的 NFS 客户端

2. 此时进入 CMD 命令行可以测试连接:

showmount -e 192.168.2.20

完整用法

showmount -e [server] 显示 NFS 服务器导出的所有共享。
showmount -a [server] 列出客户端主机名或 IP 地址,以及使用“主机:目录”格式显示的安装目录。
showmount -d [server] 显示 NFS 服务器上当前由某些 NFS 客户端安装的目录。

3. 此时挂载后只能读不能写,如需读写,需要修改注册表:
通过修改注册表将 Windows 10 访问 NFS 时的 UID 和 GID 改成 0 即可(其实就是 Linux 下的 root),步骤如下:
a、在运行中输入 regedit,打开注册表编辑器;
b、进入 HKEY_LOCAL_MACHINE\SOFTWARE\Microsoft\ClientForNFS\CurrentVersion\Default 条目;
c、选择新建 DWORD 值,新建 AnonymousUid,AnonymousGid 两个值,值为 0;
d、重启系统;

4. 如临时使用,可用命令行挂载:

mount \\192.168.2.20\sync S:

注意,如果挂载后在我的电脑里不显示盘符,请退出管理员权限的 CMD,卸载后在普通权限的 CMD 下重新挂载!

完整用法:

用法: mount [-o options] [-u:username] [-p: ] <\\computername\sharename>

-o rsize=size 设置读取缓冲区的大小(以 KB 为单位)。
-o wsize=size 设置写入缓冲区的大小(以 KB 为单位)。
-o timeout=time 设置 RPC 调用的超时值(以秒为单位)。
-o retry=number 设置软装载的重试次数。
-o mtype=soft|hard 设置装载类型。
-o lang=euc-jp|euc-tw|euc-kr|shift-jis|big5|ksc5601|gb2312-80|ansi
指定用于文件和目录名称的编码。
-o fileaccess=mode 指定文件的权限模式。
这些模式用于在 NFS 服务器上创建的
新文件。使用 UNIX 样式模式位指定。
-o anon 作为匿名用户装载。
-o nolock 禁用锁定。
-o casesensitive=yes|no 指定在服务器上执行区分大小写的文件查找。
-o sec=sys|krb5|krb5i|krb5p

5. 如需要重启后自动挂载,可以向添加 SAMBA 共享一样使用磁盘映射,格式也一样,但需要注意:卸载时不要使用资源管理器的 “断开网络驱动器”,要去命令行用:

umount S:

卸载,如果要卸载全部 NFS 网络驱动器,用:

umount -f -a

[8/59]  < 3 4 5 6 7 8 9 10 11 12 > ... »